Remote Control Robot
ECE 5725 Final Project, Fall 2022
By Shuyao Fu, Xinyue Li
Demonstration Video
Introduction
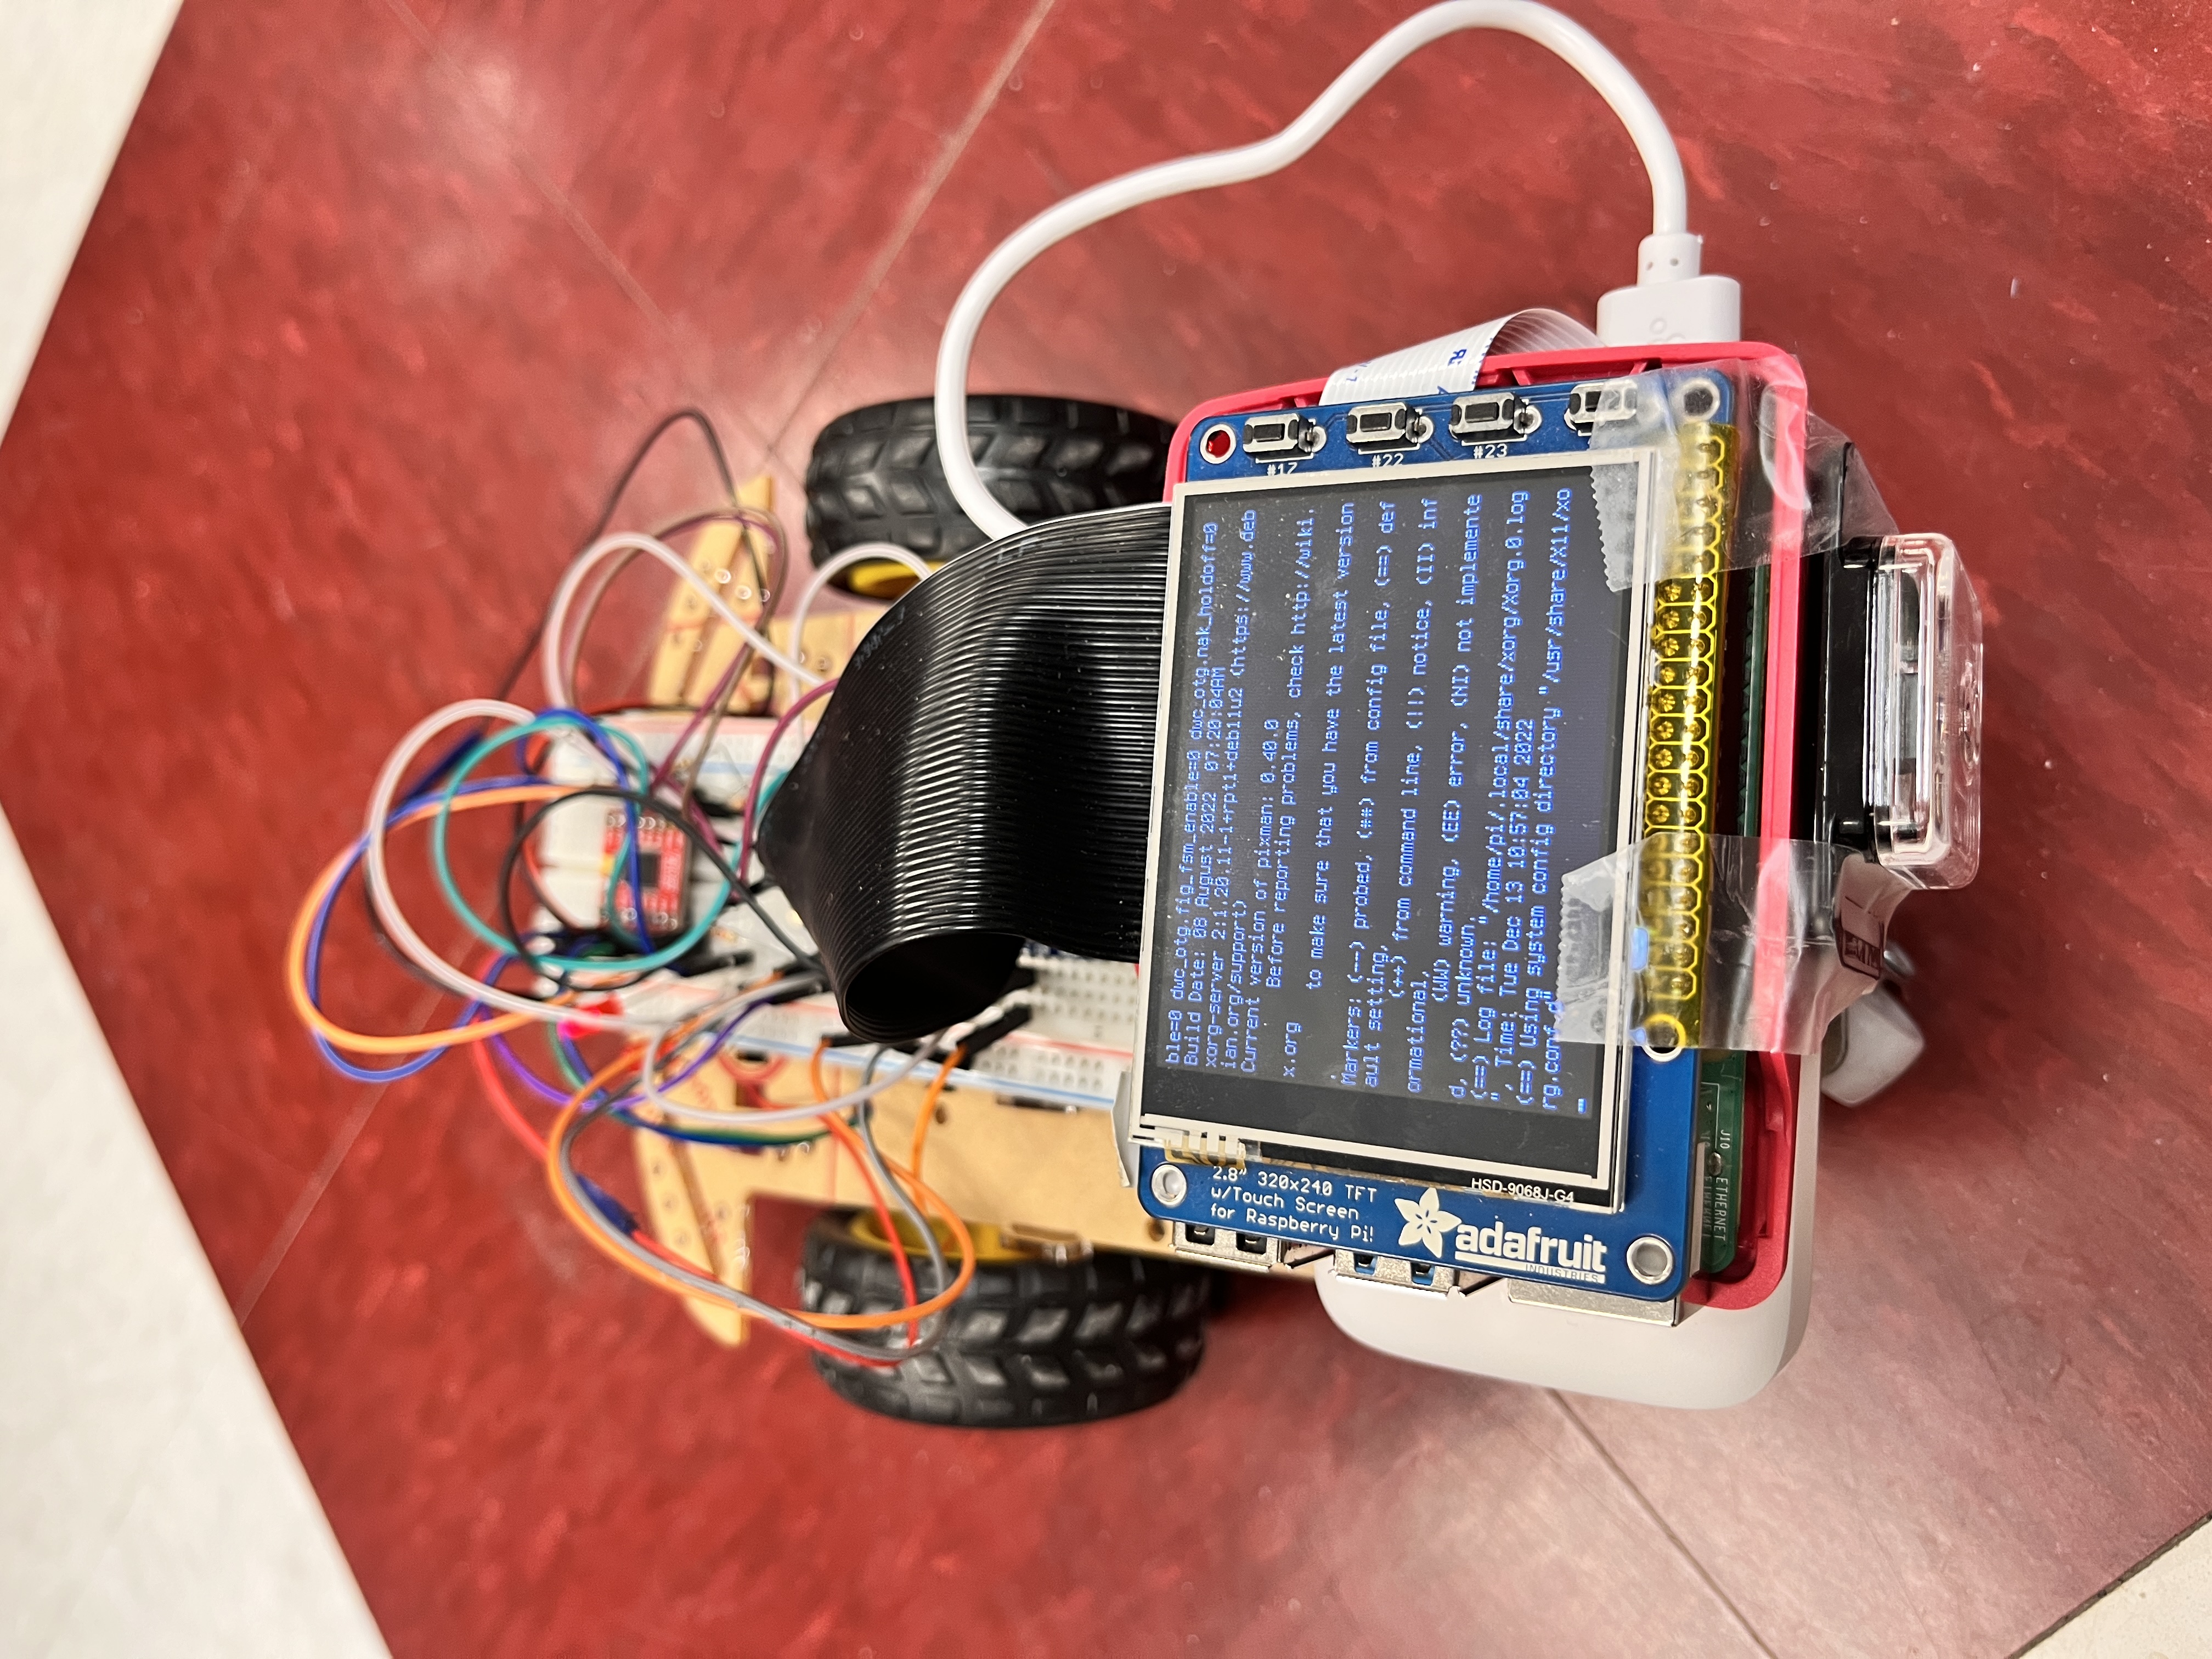
Figure 1:System Overview
The remote control robot is a remote control car that can be remotely controlled by an android application on the phone. We built a Raspberry Pi 4 based robot with the following features:
- TCP communication between the robot and the application;
- Send live video from the camera to the application;
- Control the movement by commands from the application;
- Modify IP address and port in the application.
Project Objective
In environments such as narrow places where people can’t get through, a remote control robot can play an important role in getting the live environment information and sending it back to the control platform.
Remote control robot is robot that can be remotely controlled by an android application on the phone.
Design and Testing
Hardware Design
We used two motors, one dual motor controller, one camera and one Raspberry pi as the component of our robot. The Raspberry pi sends pwm and control signal to the dual motor controller,
the controller converts the signals into the high/low motor input voltage level.
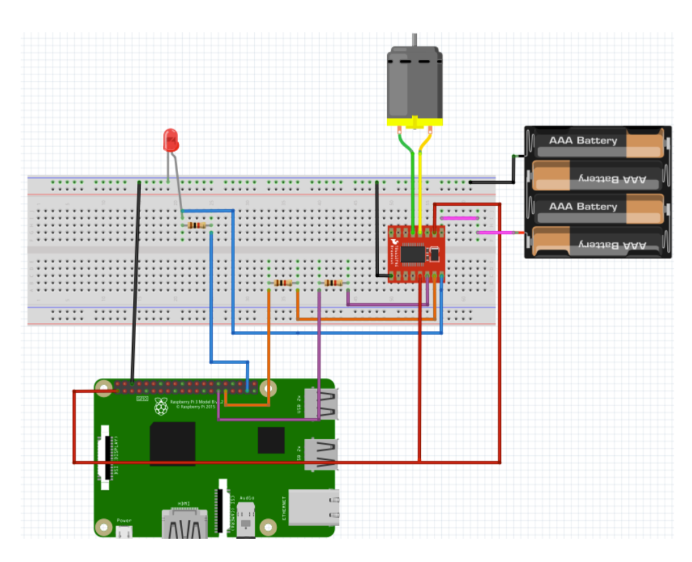
Figure 2:Hardware design (Source: Course Material)
Software Design
There are two major parts of the software design: server side design and client side design.
The server runs on Raspberry Pi and has two major functions: 1) Streaming video to the client and 2) Receive and process control signal sent from the client. We used two different ports for those two functions. When the Raspberry Pi starts, it will automatically start the server, streaming video to one of the ports and listening for client connection on the other port. We used the Python package picamera to handle video capture and streaming. For control signal reception and processing, we used socket as a communication tunnel. Socket is a common interface provided by many programming languages. It provides us with a convenient way to initialize and establish TCP connections between server and client. In order to achieve a safe exit when we close the server, we start a new thread listening to the port responsible for receiving control signals and use daemon mode during thread initialization.
The client in this project will be an Android application. The client receives video streaming from one port of the server and sends control signals to the other port. We encapsulate all the control signal sending related functions in a MessageSender class, which will be created and initialized every time we start the application.
Besides backend design, we also designed and developed some interesting and useful features in our application. There are two pages in the application: a welcome page and one main function page.
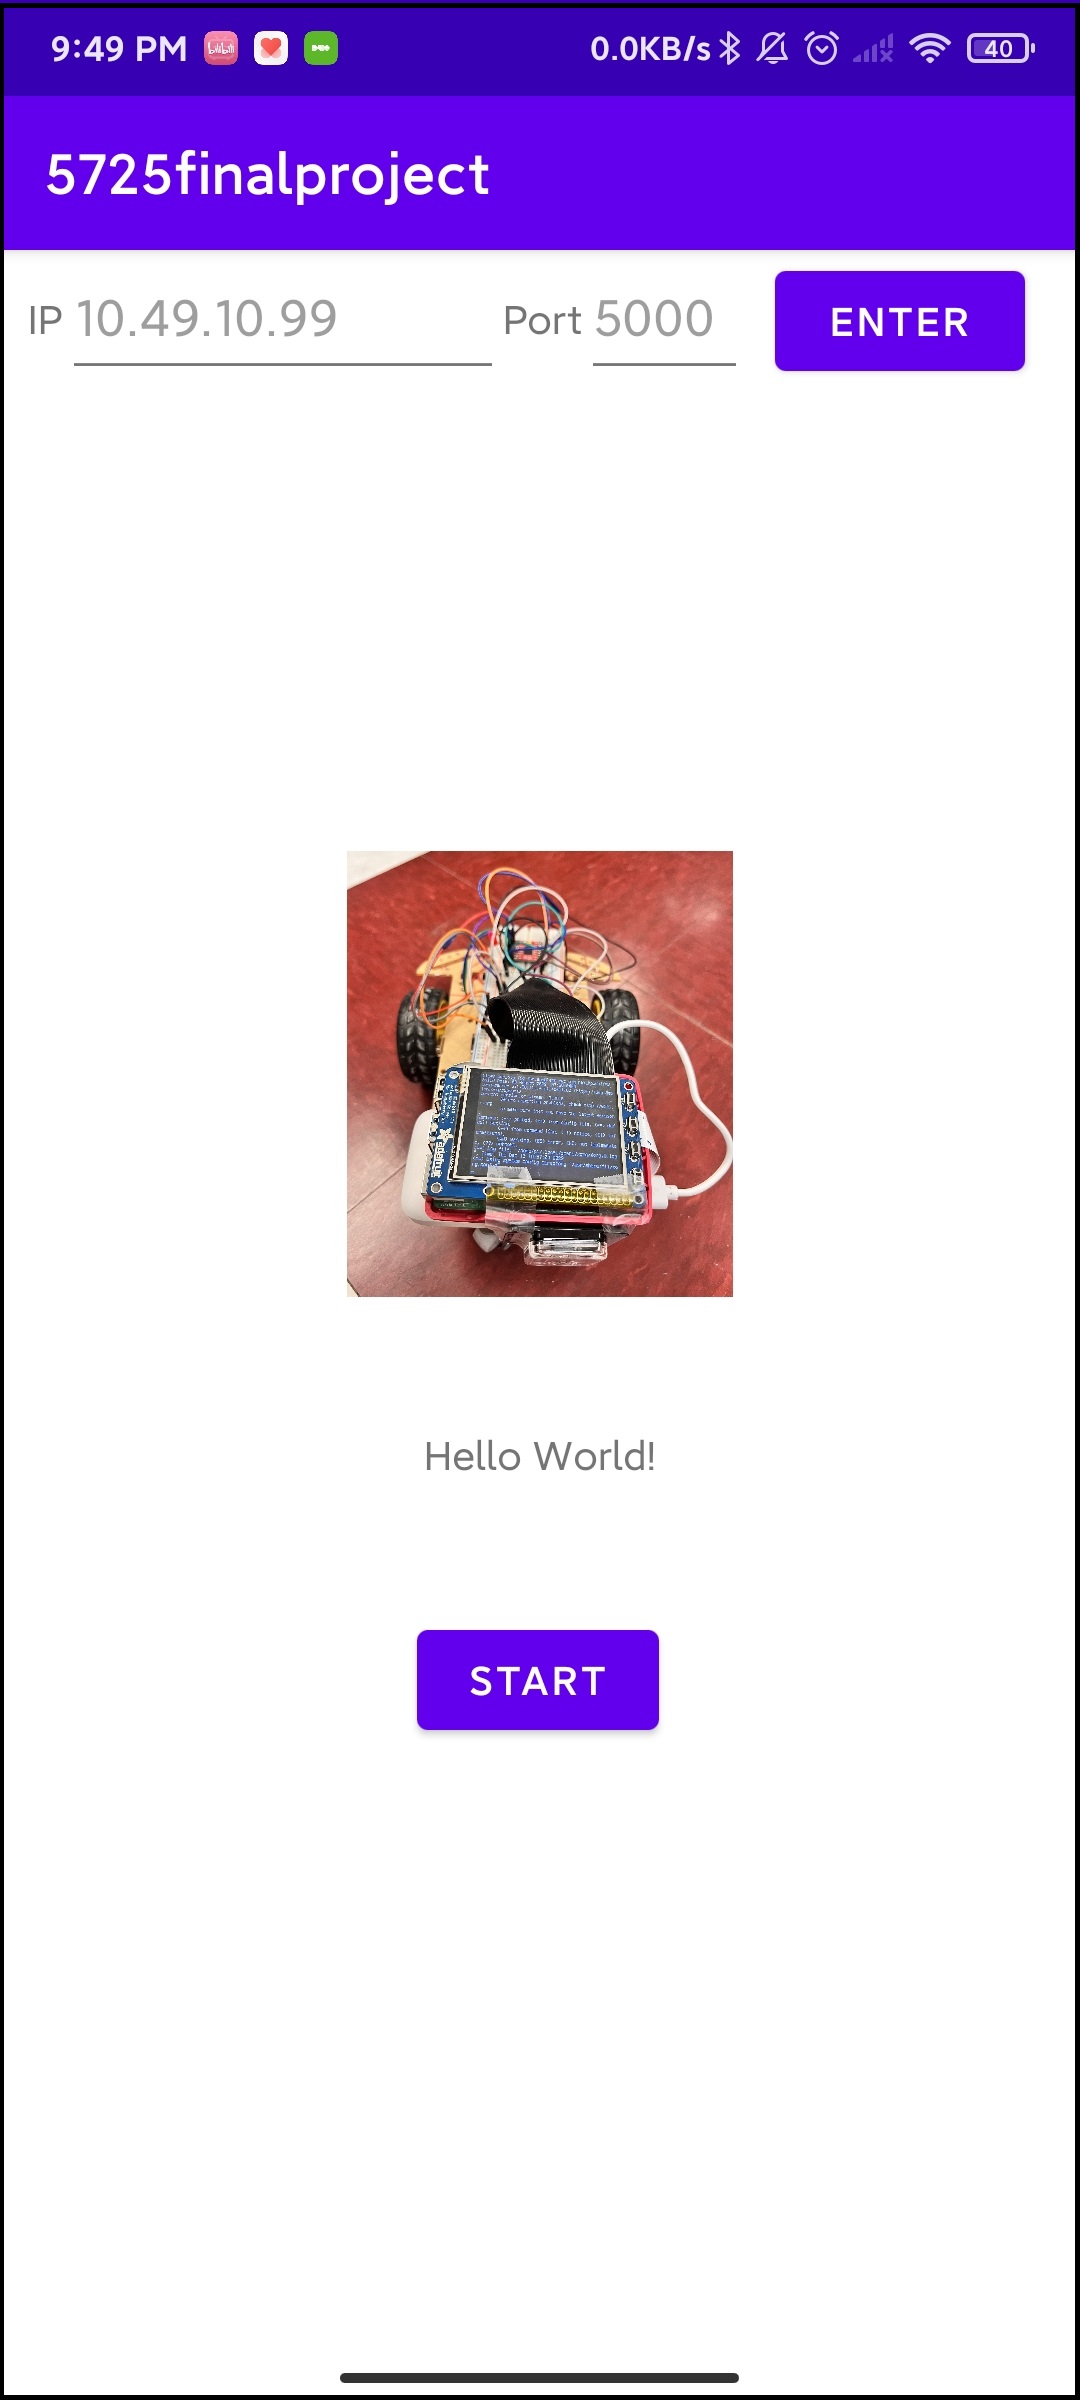
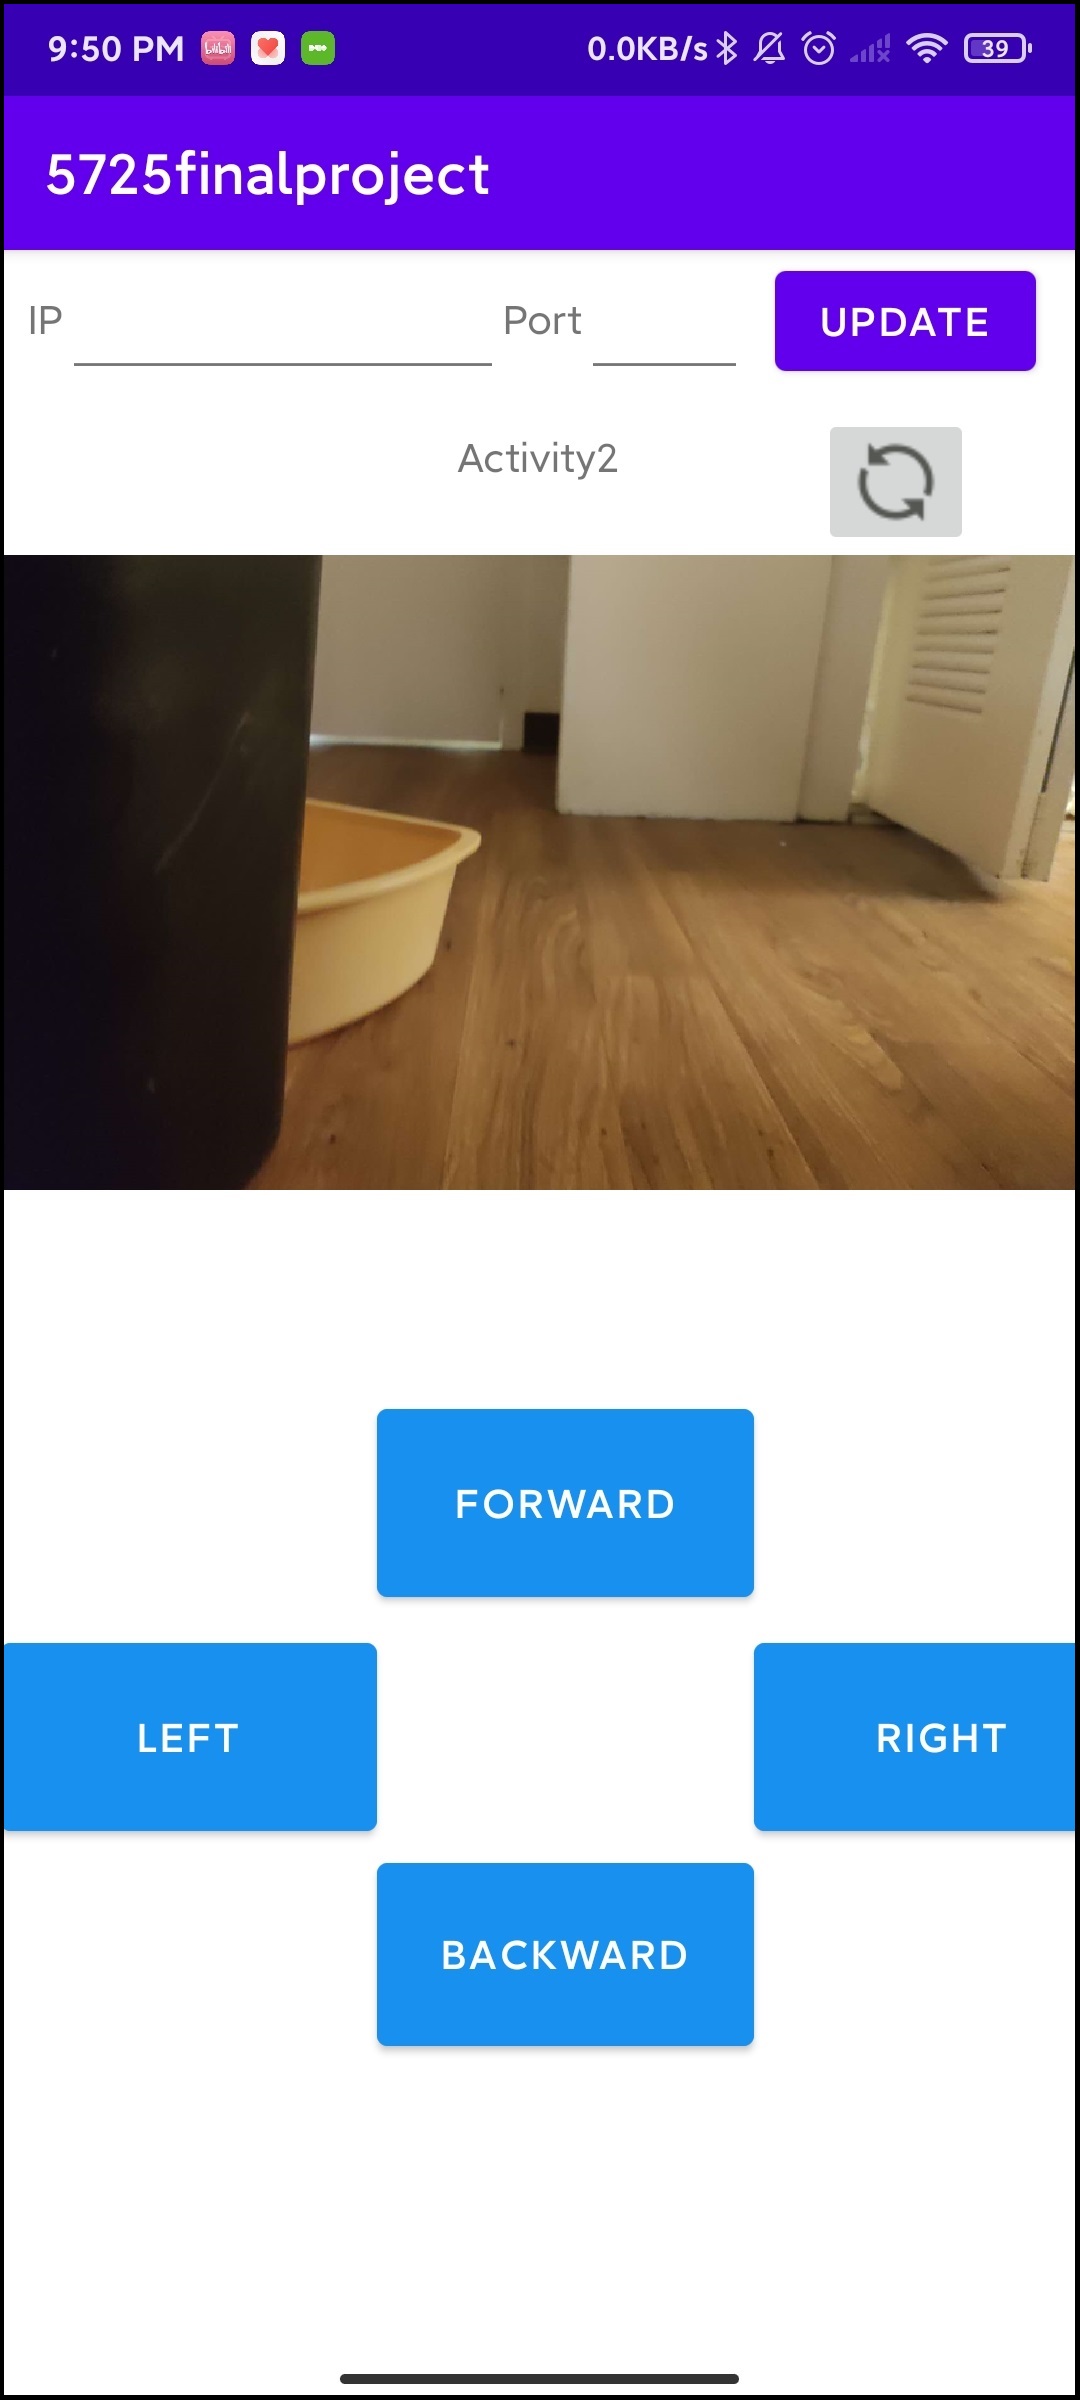
Figure 3:Software Interface
The app user can enter the desired ip address and port in the first page or they can also update them in the second page. When a new ip address or a new port is inputted, a message box will pop up and confirm the change.
In the second page there are two major parts: streaming video display area and control panel. The video signal received from the server will be displayed in the streaming video display area. The control panel consists of four buttons, which are also the direction the user wants the robot to move towards. When we press the buttons the robot will start moving until we lift our finger. Considering that the WIFI connection is not stable all the time, in order to provide better user experience we used multithreading in the control signal sending. When a button is pressed, a new thread will be created and handle the signal sending request. It can be quite useful when there is internet congestion or when users need to send a lot of commands to the robot. All these are encapsulated in the MessageSender class.
Besides the major function of the app, we also developed some useful features that can better improve the user experience. We put a small refresh button on the upper right corner of the video streaming area. This is used when the user updates the ip address or port, the video display area needs to be refreshed before the new streaming video is displayed on the page. Also the updated connection information will be displayed right above the streaming display area, which can be quite useful for troubleshooting. We also developed a zoom in and zoom out feature for the video display box to give us the desired view we wish to have. Moreover, we added vibration to the button when they are pressed, which offers the app user some more feedbacks and real-life experience of controlling a fast moving robot. Besides that, when users press the buttons, the audio of the direction will be played, which could help users with visual impairment.
Testing
We included 5 testing schemes. 1) Press the buttons and check if the robot can move towards the desired direction. 2) Input a new ip address and port and check if the connection information can be updated correctly. 4) When buttons are pressed, the audio is the direction that the robot is heading towards. 5) Change the resolution setting in the server and check if the received video is also changed in the desired way.
Results
The project was a success, we can switch between pages in the Android app, input and update the ip address and port. On the second page of the app, we can receive video streaming from the robot and control the robot at the same time through the app on our phone. When we press the buttons we can get vibration as well as audio feedback. The robot can move forward, backward, left and right according to our instructions.
Conclusions
This project involves both Raspberry Pi development and Android app development. The Android app is developed using Android studio which is a very convenient IDE for Android development. It has an emulator that greatly speeds up our development process.
Raspberry Pi is a very powerful tool and is very suitable working as the heart of the robot. Combined with an android application, Raspberry Pi can become a platform that supports more diversified robot features and opens more possibilities for the future.
Future Work
- Add motor speed feedback to improve straight line moving;
- Add more features to the app, including connection status check, Bluetooth and WIFI connection options and more complex command to be sent from app to the robot;
- Add more video processing features, including video recording and object detection;
- Upgrade the hardware that provides more precise movements.
Parts List
- Raspberry Pi 4 - Provided in Lab
- Robot Kit - Provided in Lab
- Raspberry Pi Camera - Provided in lab
- LEDs, Resistors and Wires - Provided in lab
Work Distribution
Project group picture
Xinyue Li
xl767@cornell.edu
Responsible for hardware design and assembly.
Shuyao Fu
sf582@cornell.edu
Responsible for Android application development and testing.
References
[1] This HTML Template provided by Joseph Skovira[2] Android developer guide
[3] Python socket guide
[4] Raspberry Pi guide and resources
Code Appendix
The code is located at the public Github repository.